How to Replace Toilet Flapper: Discover Practical Steps for Success in 2025
Replacing a toilet flapper can seem daunting, but it’s an essential skill every homeowner should master. Whether you’re dealing with a running toilet or simply want to upgrade your toilet’s efficiency with a water-saving toilet flapper, this step-by-step guide will walk you through how to change a toilet flapper easily and effectively. Understanding the different types, sizes, and installation steps will empower you to tackle this common toilet repair confidently.
Understanding the Function of a Toilet Flapper
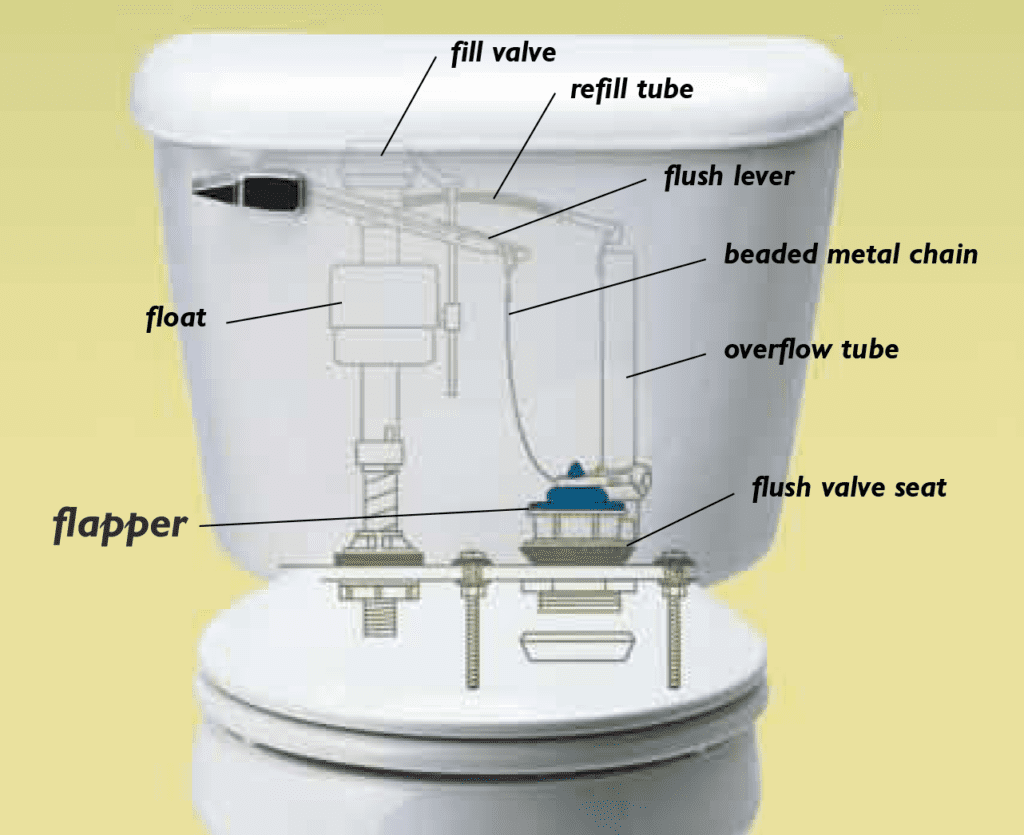
The **toilet flapper** is a crucial component in the toilet flushing mechanism. Acting as a valve, it controls the flow of water from the toilet tank to the bowl during a flush. A well-functioning flapper ensures the **toilet flush system** operates correctly and efficiently. Over time, the materials used in flappers can degrade, causing leaks or improper flushing. This often leads to high water bills and toilet water flow issues which necessitate a **toilet flapper replacement**. Understanding how a toilet flapper works provides the foundation for effective **toilet maintenance** and repair.
Common Signs You Need to Change the Toilet Flapper
Before embarking on your **toilet flapper installation**, it’s essential to identify when a replacement is necessary. Common symptoms include a constant running toilet, delayed flushing, or accompanying sounds of water cycling through the tank sporadically. By learning how to troubleshoot common toilet failures, homeowners can save on water costs and enhance their toilet’s functionality. Additionally, if you notice signs of wear, such as cracks or a discolored flapper, it’s time to make the switch to a new one to prevent further issues.
Types of Toilet Flappers Available
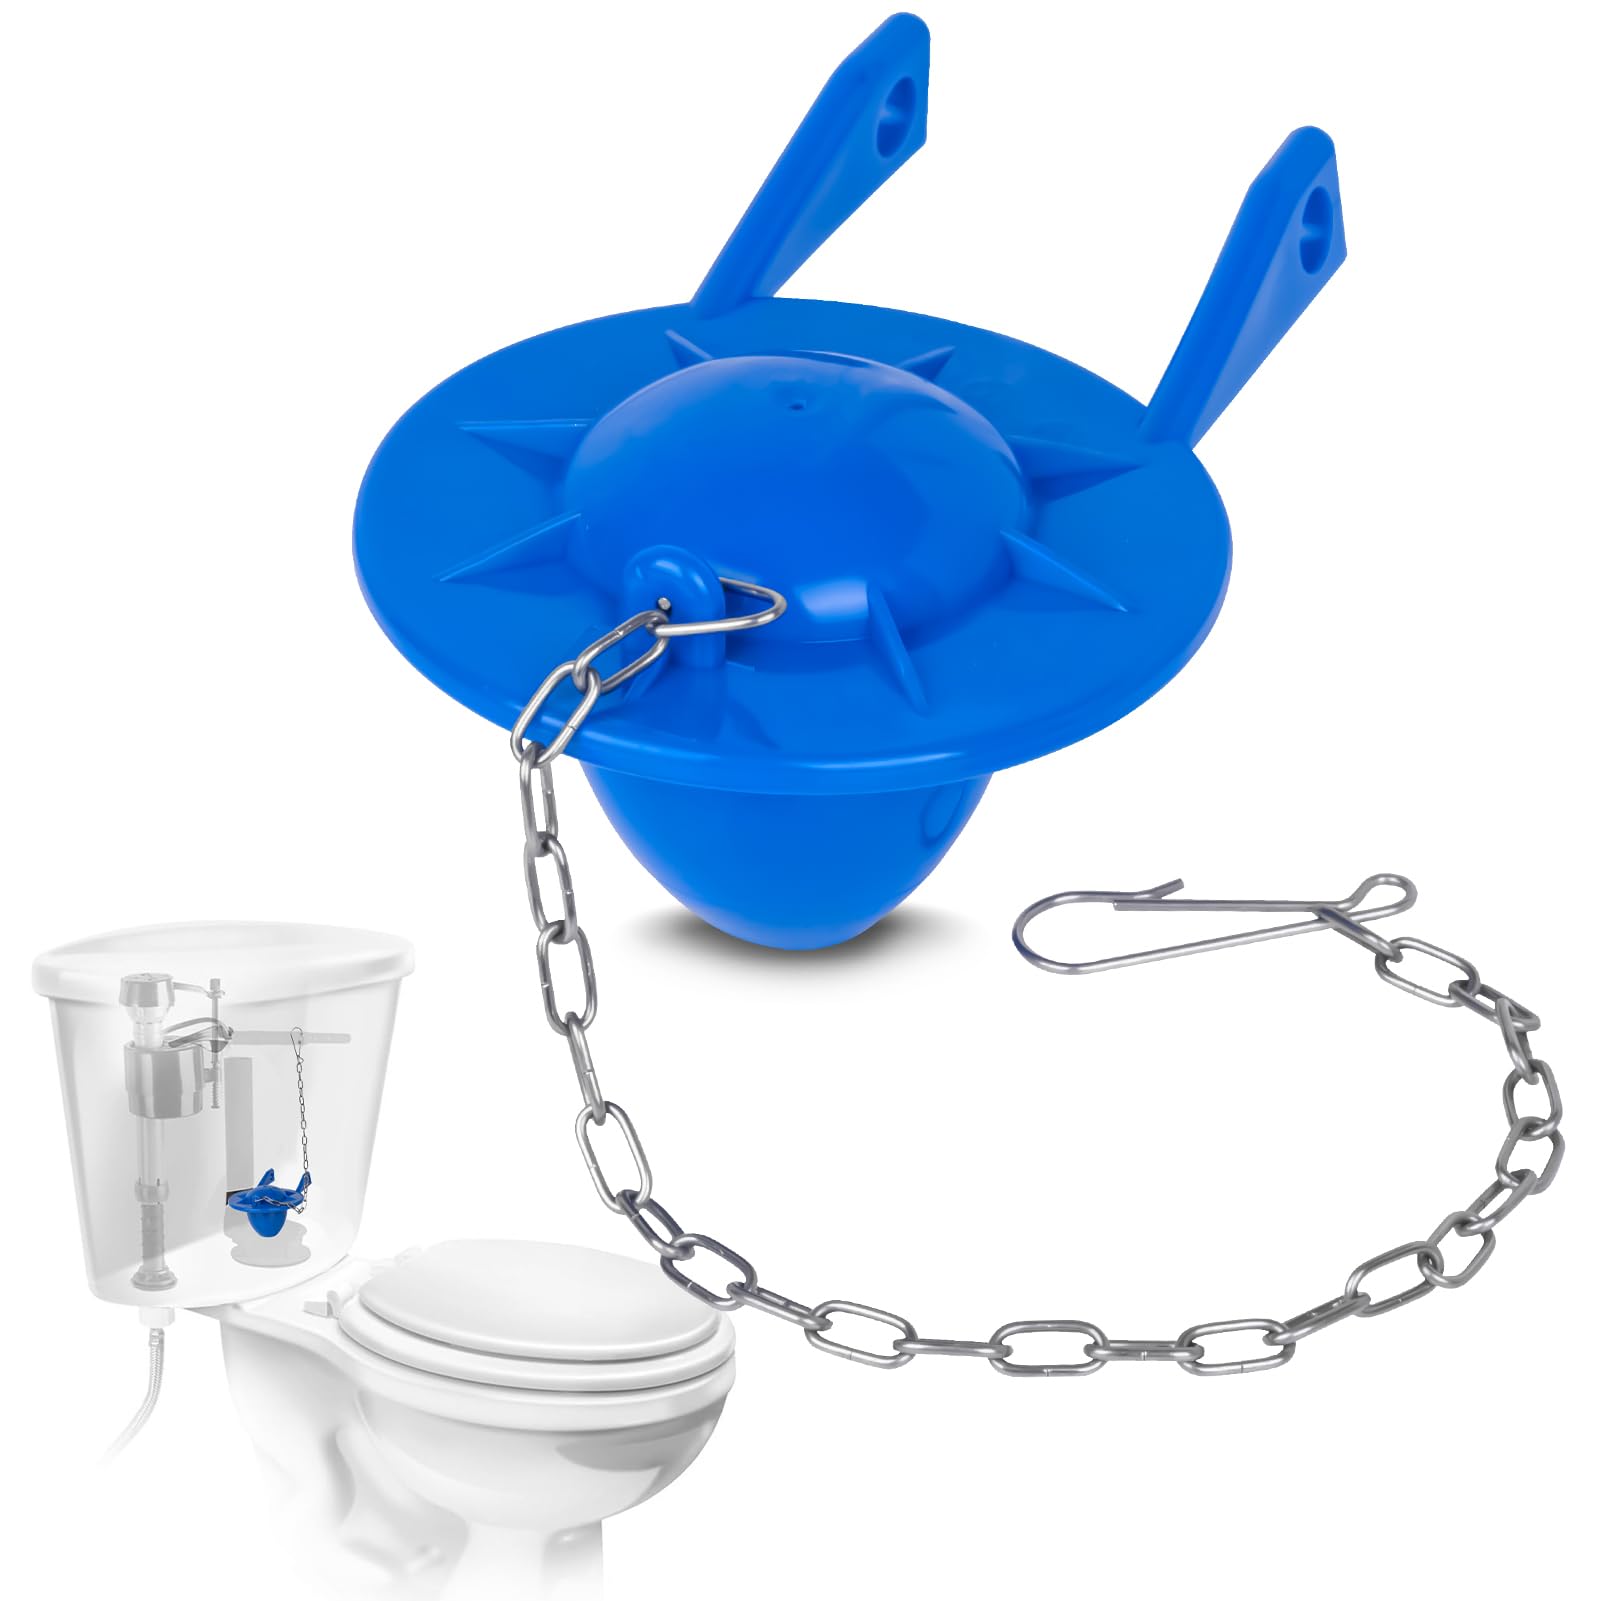
Choosing the right **toilet flapper** can make all the difference. There are various options available, such as **adjustable toilet flappers** for wider compatibility across different tank designs, rubber or PVC types, as well as floating toilet flappers that enhance flushing efficiency. Ensuring you select the best toilet flapper based on your toilet’s specifics can greatly improve performance and reduce common issues. Always check the **toilet flapper size** before purchase to ensure compatibility with your toilet model.
DIY Steps for Toilet Flapper Replacement
Changing a toilet flapper is a straightforward process that anyone can handle with minimal tools. Below is a systematic approach to successfully complete your **toilet flapper replacement**:
Step 1: Gather Required Tools and Parts
Before starting, gather essential **plumbing tools** such as an adjustable wrench, a flathead screwdriver, and a new toilet flapper. Additionally, ensure you buy the right **toilet parts replacement** components by checking your existing model and type. Understanding the specific requirements of your toilet’s **water valve** and **flushing mechanism** will streamline the process.
Step 2: Remove the Toilet Tank Lid
Carefully remove the **toilet tank cover** and set it aside in a safe location. This step is crucial for accessing the interior parts without risking damage. It will expose the **flapper chain** and provide a clear view of how the flushing mechanism works. Take a moment to examine the **toilet tank assembly** for any other potential issues, such as worn-out washers or additional leaks that might need attention during this repair.
Step 3: Disconnect the Old Flapper
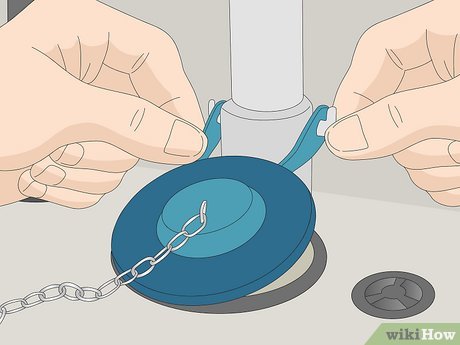
Locate the **flapper valve** and detach it from the toilet tank. This often involves unclipping it from the flush valve. Carefully unhook the **flapper chain** from the trip lever and set the old flapper aside. It’s important to note how the flapper was attached for easier installation of the new part. Make sure you also check the **flapper valve seat** for any buildup that could hinder the new flapper’s effectiveness—clean if necessary.
Step 4: Install the New Toilet Flapper
Attach the new toilet flapper to the flush valve, following the instructions included with the pack. Ensure that it’s secured properly and that the **toilet flapper chain** is connected to the trip lever. Adjust the chain length if necessary to ensure a proper seal during the flush, allowing the flapper to lift effectively. Proper **toilet flapper adjustment** is key to maximizing toilet function.
Maintenance Tips for a Healthy Toilet Function
Regular maintenance can prolong the lifespan of your toilet flapper and reduce the frequency of repairs. Here are some practical tips to keep your toilet running smoothly:
Regular Cleaning
Occasionally, mineral deposits can accumulate on the **toilet flapper**, affecting its ability to seal properly. Gently clean the flapper and its seat with a cloth or sponge, avoiding harsh chemicals that can damage the rubber or plastic components. Checking the **toilet flapper seal** regularly can help prevent leaks and ensure optimal flushing efficiency.
Monitor Water Levels
Maintain the proper **toilet tank water level**. This affects the flapping action during flushes and can contribute to issues if the water level is too high or too low. Adjust the settings of the float valve mechanism inside the toilet tank to achieve the desired level. Proper adjustments not only solve flushing problems but also address water savings effectively.
Seasonal Inspections
Conduct seasonal checks to catch any wearing or signs of damage early—especially if you live in colder climates, as temperature fluctuates can exacerbate wear on toilet components. Inspecting the **toilet functions** periodically, including the toilet flush system, means you can make changes before significant failures occur.
Key Takeaways
- Regular inspections and timely **toilet flapper replacement** can save water and repair costs.
- Understanding different types and selecting the right **toilet flapper** is crucial for functionality.
- Simple **DIY toilet repair** techniques can enhance your plumbing skills and maintain your toilet’s efficiency.
- Thorough cleaning and monitoring can maximize your toilet’s longevity and performance.
FAQ
1. What materials are toilet flappers typically made from?
Toilet flappers are commonly made from rubber or PVC. Rubber flappers tend to be more flexible and can create a better seal, while PVC options are often more durable. Selecting the appropriate material depends on the age of your toilet and specific water conditions as they can impact the lifespan of the **toilet flapper**.
2. How can I tell if my toilet flapper is the right size?
It’s vital to match the **toilet flapper size** to your toilet model. Generally, measuring the diameter of the hole in the flush valve will provide guidance. You can also take the old flapper to a home improvement store for comparison. Using the wrong size can lead to inefficient flushing and increased water bills.
3. How often should a toilet flapper be replaced?
On average, a toilet flapper can last anywhere from 3 to 5 years. However, if you notice many **toilet flushing problems** or the flapper appears deteriorated, consider replacing it sooner to avoid larger issues. Regular inspections will help you gauge when a replacement is needed.
4. Can I fix a leaking flapper without replacing it?
In some cases, cleaning the flapper or adjusting its position can temporarily fix a leak. However, worn-out flappers generally need replacement to ensure a proper seal and function. Regular checks can prevent minor issues from escalating into costly repairs.
5. What are the benefits of using a water-saving toilet flapper?
Water-saving toilet flappers are designed to reduce the amount of water used per flush, offering environmental benefits and reducing water bills. They can help prevent toilet water flow issues that lead to excessive water use, making toilets more efficient in the long run, aiding conservation efforts, and aligning with sustainable plumbing practices.
6. How do I troubleshoot common toilet flushing issues?
To fix common flushing issues, first, check if the flapper is sealing correctly. Inspect the flapper, chain length and toilet tank water level. Further, ensure the flush valve is free from debris. If problems persist, a detailed **toilet repair guide** can offer additional insights for specific flushing concerns.
7. Are there special tools needed for toilet flapper installation?
Typically, installing a toilet flapper requires minimal tools: a screwdriver and an adjustable wrench are usually sufficient. However, having a level handy can help ensure optimal tank water levels, contributing to effective installation and function.
By following these insights, you’ll be better equipped for a seamless toilet flapper replacement experience, contributing to the longevity and effectiveness of your toilet system.