Top 7 Effective Methods for Creating Beautiful Tissue Paper Flowers in 2025
Tissue paper flowers are an excellent way to add vibrant colors and unique designs to any home decor or event. In 2025, the art of making DIY tissue paper flowers has continued to thrive, providing individuals with an outlet for creativity and craft. This article will guide you through the top 7 effective methods for crafting stunning **tissue paper flowers**, emphasizing the best techniques, tips, and creative ideas that can elevate your floral décor projects.
1. Choosing the Right Materials for Your Tissue Paper Flowers
The foundation of beautiful **tissue paper flowers** starts with selecting high-quality materials. Begin with vibrant hues, as **colorful tissue paper flowers** will naturally draw attention. Look for tissue paper with durability and vibrant colors to enhance your floral designs. You can experiment with different weights of paper for varied looks—thicker papers allow for more structural integrity in larger flowers. In addition to tissue paper, gather other crafting supplies like scissors, wire, and floral tape which come in handy during **flower making with tissue paper**.
1.1. Budget-Friendly Craft Supplies
Crafting doesn’t need to break the bank! Consider purchasing **budget-friendly craft supplies** from local dollar stores or craft outlets, where you can find colorful tissue paper, scissors, and other essential items at a lower price point. Thrift stores can also yield affordable materials for your **tissue paper craft** projects. The goal is to accumulate supplies that will allow you to create vibrant creations without the hefty price tag.
1.2. Gathering Creative Tools
Beyond tissue paper, remember to gather other creative tools to enhance your flower-making journey. Items like glue sticks, hot glue guns, and even embellishments, such as beads or glitter, can turn **simple tissue paper flower patterns** into extraordinary designs. Using these **crafting techniques** helps add individuality to your **homemade tissue paper flowers**, making them dazzling centerpieces or party décor. Incorporate layers and textures for a standout effect!
2. Basic Tissue Paper Flower Techniques
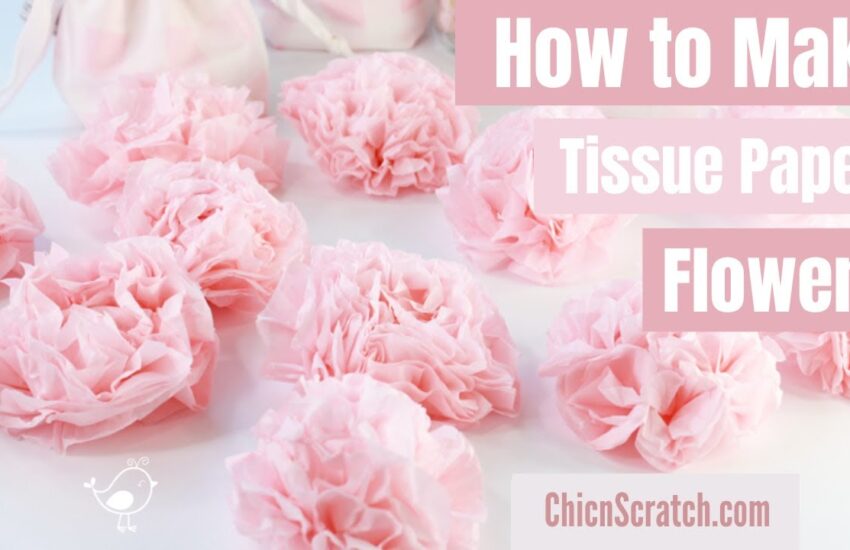
Once you have your materials ready, you can begin mastering the basic **tissue paper flower techniques**. The easiest method is creating **easy tissue paper flowers**, where you fold sheets of tissue paper, cut the edges, and then pull apart the layers for a fuller look. For beginners, start with a flat design by using square cuts of tissue paper to create beautiful blooms effortlessly.
2.1. Step-by-Step Flower Crafting
To make your own **colorful tissue paper flowers**, follow this step-by-step tutorial:
1. **Layer multiple sheets of tissue paper** (about 6-10) for a fluffier flower.
2. **Fold the paper in an accordion style**, making 1.5-inch folds continuously until you reach the end of the paper.
3. **Secure the center with floral wire** tightly; this will be the flower’s stem.
4. **Round off the edges** with scissors to create a petal-like shape.
5. Gently **separate each layer, pulling them apart towards the center** to form a full flower.
6. If desired, dip the edges in water-based paint for artistic accents that pop.
2.2. Layering for Depth and Texture
Layering is a crucial step in achieving **vibrant tissue paper flowers**. By combining different colors and textures, you not only create depth but also enhance visual appeal. Try using several shades of the same color or contrasting colors for your blooms. Taller tissue flowers can utilize thinner sheets for structure—this layering technique significantly contributes to the aesthetic and final design of your **DIY flower decorations**.
3. Designing Unique Flower Arrangements
Next, focus on the art of **tissue paper flower arrangements** to display your creations beautifully. Arrangement involves more than just sticking flowers in a vase; you’ll want to consider scale, color balance, and placement. Create unique floral displays using a mix of sizes; this variety creates dynamic and visually-interesting compositions.
3.1. Creative Tissue Paper Flowers for Events
If you want to add flower power to your event decor, consider how **festive tissue paper flowers** enhance your design. You can create oversized roses and daisies that serve as beautiful, eye-catching centerpieces. These can also be hung as **tissue flower wreaths** or used as backdrops for parties and weddings. Attractive arrangements tend to capture attention while maximizing the space effectively.
3.2. Using Tissue Flowers for Weddings
Flowers can be an integral part of wedding décor. For a unique style, use **tissue paper wedding flowers** in various sizes to create a cohesive theme. Mix pastel colors and accentuate with sparkling embellishments to keep your designs looking elegant and clean. Collectively, your **beautiful tissue paper flowers** can transform regular spaces into enchanting venues while being completely budget-friendly.
4. Exploring Advanced Floral Techniques
Finally, as you hone your skills in creating **DIY tissue paper flowers**, dive into advanced floral methods to elevate your paper craft further. Techniques like **layering tissue paper flowers** together or employing origami folds can undeniably give each project a unique twist.
4.1. Experimenting with Shapes and Styles
Challenge yourself with **unique tissue paper flower styles** by trying different flower shapes, like tulips or lilies. Use varying techniques, such as twisting or bending petals for an unfinished yet artistic look. Allow your imagination to run wild with **paper blooms tutorials**, and soon, you’ll be crafting an entire garden of your own stunning designs.
4.2. Utilizing Natural Themes in Flower Designs
Incorporate themes from nature to inform your **floral decorations tissue paper** projects. Analyze existing flowers and replicate their shapes and color palettes using tissue paper. Attempt design ideas based on actual flora will open new possibilities while keeping your creation stunning and authentic. Explore ways to integrate your **art and craft projects** with the beauty of nature!
Key Takeaways
- Start with high-quality materials and vibrant colors for your **tissue paper flowers**.
- Master basic techniques before advancing to unique styles in flower designs.
- Arrange your creations thoughtfully to maximize their visual impact.
- Get inspiration from nature for more authentic designs and appearances.
FAQ
1. What are the best types of tissue paper for making flowers?
Look for high-quality tissue paper with bold colors and specific weights. Thicker types often hold structure better for larger blooms, while regular tissue paper is great for making **decorative tissue paper flowers**. Experiment with various brands to find what works best for your **flower making with tissue paper** projects.
2. How do I make my tissue paper flowers last longer?
To enhance durability, consider using fabric stiffeners on your **DIY tissue paper flowers** before forming them. By spraying or dipping the flowers in the stiffener, they essentially become weather-resistant and can be preserved for longer use as decor.
3. Can I use other types of paper for creating flowers?
Absolutely! While **tissue paper blooms** are the most common, you can also experiment with crepe paper or cardstock for varying textures and sturdiness. Different papers can produce unique effects, offering varied aesthetics in **floral decorations tissue paper** designs.
4. How can I utilize tissue paper flowers for party decorations?
**Tissue paper flowers** can be hung across ceilings, placed in arrangements as table centerpieces, or even used in DIY photo booths for vibrant backdrops. By incorporating colorful flowers into your decorating scheme, you can enhance the overall theme of your party effortlessly.
5. Are there ways to involve kids in making tissue paper flowers?
Yes! Creating **kids crafts with paper** like tissue paper flowers is a fantastic activity for engaging them. Simple folding and cutting instructions make it easy for children to participate. Make this a fun family activity with age-appropriate tasks in creating their own beautiful blooms!