How to Properly Fix a Hole in the Wall: Expert Tips for a Flawless Finish in 2025
Fixing a hole in the wall may seem daunting, but with the right techniques, tools, and a bit of patience, anyone can achieve professional-looking results. Whether you’re dealing with minor imperfections such as nail holes or larger issues stemming from accidents, knowing how to repair drywall effectively is essential for maintaining a beautiful home. This comprehensive guide will equip you with key insights and practical solutions for wall repair, ensuring your walls look flawless after maintenance.
In this article, we will explore various wall repair techniques, tools you need for the job, and effective methods for ensuring a seamless finish. From spackling to painting, you will learn about each stage, making it accessible for beginners and seasoned DIY enthusiasts alike. By focusing on prevention and maintenance strategies, you can keep your walls looking pristine year-round.
Key takeaways include understanding different patching methods, utilizing proper drywall repair tools, and mastering wall finishing techniques. With these tips, you can tackle any wall repair project confidently!
Getting Started: Essential Tools for Wall Repair
Before diving into wall repair, having the right tools at your disposal is crucial. Gathering quality wall repair supplies will streamline the process and yield better results. Here’s a brief overview of the essential tools you’ll need:
Basic Tools for Patching Holes
To effectively patch a hole in the wall, start with the basic tools. You will need:
- Putty Knife: For applying spackle and smoothing the surface.
- Sandpaper or Sanding Block: To prepare the surface for a smooth finish.
- Drywall Compound: A key component for filling in the holes.
- Utility Knife: Useful for cutting drywall pieces accurately.
- Paintbrush or Roller: For final touches after repairs.
Choosing Quality Patch Materials
Investing in high-quality patching materials can make a significant difference. For small holes, a lightweight spackle is ideal, while larger holes may require a piece of drywall and joint compound. Always opt for products that offer durability, smooth application, and good adhesion to ensure long-lasting results.
Gathering Preventive Wall Repair Supplies
Preventive measures can save time and reduce the frequency of repairs. Consider stocking up on caulking, wall texture spray, and effective cleaning supplies. These will help maintain wall integrity and make future repairs easier.
Building on these fundamentals, let’s move forward into understanding various drywall repair methods.
Understanding Different Drywall Repair Methods
With your tools ready, it’s time to delve into the various drywall repair methods you can utilize, depending on the size and type of hole you’re dealing with. Each method caters to different scenarios, ensuring you can effectively address any issue.
Patching Small Holes with Spackle
Spackling is the go-to solution for minor wall damages, like nail or screw holes. To fix small holes, begin by cleaning the area around the hole, ensuring there’s no dust or debris. Use a putty knife to apply the spackle directly into the hole, filling it in completely and smoothing the surface. Allow it to dry, sand it down for a flush finish, and then paint over as needed.
Using Drywall Patches for Medium Holes
For holes larger than what spackle can cover but smaller than a system replacement, drywall patches are ideal. Cut a square patch from a piece of drywall, ensuring it’s slightly larger than the hole. Attach it using screws or adhesive tape, then cover the seams and patching areas with joint compound. Sand it smooth once it’s dried.
Repairing Large Holes with Drywall Replacement
When faced with larger wall damage, you’ll need to replace the entire drywall section. Cut a square section out around the damaged area, ensuring it fits cleanly. Install a new drywall piece by securing it to the framework and applying joint compound over the seams. Once dried, sand and paint it for a seamless look.
With these methods understood, we can now look into surface preparation and the importance of proper technique.
Surface Preparation for Successful Wall Repair
Effective wall repairs begin with proper surface preparation. This stage ensures the materials adhere well and look seamless post-repair. Let’s explore how to get your wall ready for repair work.
Cleaning and Inspecting the Wall
Before beginning any repair, inspect the wall for underlying issues like moisture or structural damage. Clean the area thoroughly to remove dust, grime, or loose paint. This step is crucial for proper adhesion of your repair materials.
Assessing Damage Extent
Understanding the extent of the damage allows you to choose the correct repair method. Minor cracks might only need spackling, while major holes might require drywall replacement. Take note and plan accordingly to avoid unnecessary work.
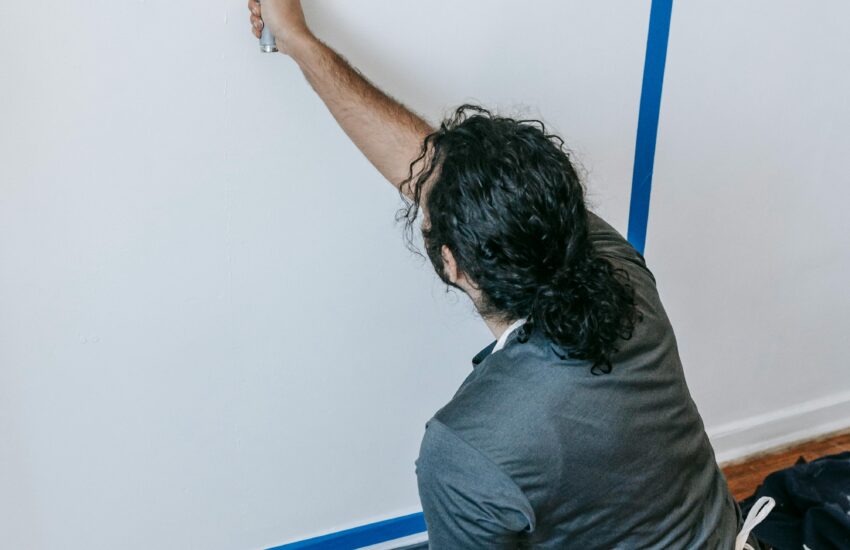
Preparing Surrounding Areas
Cover the surrounding areas with drop cloths and painter’s tape to protect them from dust and spills. This step ensures you maintain the aesthetics of other wall sections while performing repairs. Consider using a light under the wall to spot any remaining imperfections after sanding.
Taking these preparation steps will greatly enhance your repair process. With your surface ready, let’s move on to drywall compound application techniques.
Applying Drywall Compound: Techniques for a Smooth Finish
The next step in fixing your wall is the application of drywall compound. Mastering the right techniques can determine the quality of your finish. Here’s how to apply compound effectively:
Choosing the Right Compound
Select a compound that suits your needs. For beginners, lightweight compounds are easier to work with but may require more layers. For professionals, all-purpose compounds can provide durability and a smooth finish in fewer coats.
Applying Compound with a Putty Knife
Use a putty knife to apply your compound to the patched area. Start at the center and work your way outwards, spreading evenly. Ensure you fill all cracks and create a smooth surface as you go. For larger areas, a trowel may be beneficial.
Layering for Thickness and Integrity
For a robust repair, don’t be afraid to apply multiple layers of compound. Allowing each layer to dry before applying the next one is key. Sand lightly between layers for optimal smoothness. This technique is important for ensuring the repair feels stable and looks flawless.
Now that you’re equipped with drywall compound techniques, let’s discuss the sanding drywall process for a professional finish.
Sanding Drywall: Achieving a Flawless Surface
Sanding is a critical step in the wall repair process. Proper sanding can elevate the quality of your patch by ensuring a smooth finish. Here’s how to do it correctly:
Choosing the Appropriate Sanding Tools
Select sandpaper with a fine grit to avoid damaging the drywall surface. For large areas, a sanding block or electric sander can speed up the process, while manual sanding is perfect for refined work. Ensure you wear a mask to avoid inhaling dust particles.
Executing the Sanding Process
Lightly sand the area after each layer of compound has dried. Make smooth, circular motions to blend the patched area seamlessly with the surrounding wall. Be careful not to over-sand, as this can create dips or troughs, affecting the final appearance.
Preparing for Paint Application
Once the surface is smooth, wipe it down with a damp cloth to remove any dust. This step is essential for achieving a good bond between the compound and the paint. You are now ready to apply the finishing coat.
After discussing sanding techniques, we can explore what comes next: effective painting after repair.
Painting After Repair: Bringing Your Wall Back to Life
Painting is the final step in your wall repair project, bringing your hard work to fruition. Here’s how to ensure a great outcome.
Choosing the Right Paint Finish
When selecting paint, consider the wall’s environment. Flat finishes are great for low-traffic areas, while satin or semi-gloss options work better in kitchens or bathrooms due to their washability. Match the paint to your existing wall finish to blend textures.
Painting Techniques for a Professional Look
Use a roller for larger areas and a brush for edges and details. Apply at least two coats of paint for even coverage. Allow adequate drying time between coats and consider lightly sanding between applications for the best result.
Touch-Ups and Maintenance
After the final coat, inspect for any touch-ups needed. It’s wise to keep a small amount of leftover paint for future repairs. Regular wall maintenance will help you catch any needed repairs early, ensuring your finishes last longer.
Q&A: Common Questions about Wall Repair
What is the best way to fix small holes in drywall?
The best method is to use lightweight spackle. Apply it with a putty knife, smooth it out, and let it dry before sanding and painting.
How often should I check my walls for damage?
Regular checks are beneficial, especially after extreme weather or if your home experiences shifts. Inspecting quarterly helps catch minor damages before they escalate.
What types of paint should I use after repairing?
Choose paints that match the finish on your existing walls, like flat for low-traffic areas or semi-gloss for high-traffic zones. This will ensure your repairs blend in seamlessly with the rest of your home.
Can I do wall repairs myself, or should I hire a professional?
While minor repairs can easily be done by homeowners with basic knowledge and skills, larger or complicated repairs may benefit from professional attention to ensure a flawless result.
How do I maintain my walls after repairs?
Regular dusting and cleaning help maintain wall aesthetics. Address any signs of damage immediately to keep your walls looking their best.
Following these guidelines ensures your walls remain in excellent condition, enhancing the beauty and value of your home. Check out more detailed instructions on advanced wall repair techniques or explore wall maintenance tips on home upkeep and aesthetics.